分类目录归档:技术

在 linux 中解析 lib 文件

解析 lib 文件可以获取一些二进制库的版本历史信息,例如解析 /usr/lib64/libc.so.6 即可解析到 glibc 的版本历史。

在Linux中,有许多工具可以用来解析库文件( .lib 文件)。 可以使用工具如 nmobjdumpreadelf 来查看库文件的符号表,包含在库文件中的对象文件的信息,以及库文件的其他信息。

下面是一些常用的命令:

`nm`: 这个命令可以显示符号表信息。你可以运行 `nm <library-name>.lib` 来查看库文件的符号表信息。

`objdump`: 这个命令可以显示包含在库文件中的对象文件的信息。你可以运行 `objdump -p <library-name>.lib` 来查看库文件的信息。

`readelf`: 这个命令可以显示库文件的其他信息,包括符号表信息和对象文件信息。你可以运行 `readelf -a <library-name>.lib` 来查看库文件的信息。

这些命令可以帮助你解析库文件并查看其中包含的信息。

内容参考自 ChatGPT

阿里云域名续费优惠口令(com和cn续费优惠)- 2022

购买/续费云产品之前,找找优惠码是一个好习惯。

最近续费自己的 .com 域名,发现官方提供了优惠码,可以便宜一些。

获取方法是: 关注公众号“阿里云企航”,在输入框中输入“优惠口令”,即可自动回复当前最新可用的优惠口令 ,下面是我在2022年12月获取到的。

商品 行为 口令
com英文域名 续费 商标优选即买即用
cn英文域名 续费 商标智能在线检索
xin(普通词) 注册 只争朝夕
xin(普通词) 续费 不负韶华
xin(溢价词) 续费 抱诚守信

使用优惠码优惠前续费 .com 需要 75 :

使用优惠码后便宜了 6 块钱:

省的少也是钱,这是最近发现的省钱技巧,欢迎一起交流~

参考文献

查询谷歌账号注册时间方法(2022)

谷歌查看注册时间 具体方法如下:

打开“管理您的 Google 帐号”

打开“数据和隐私设置”

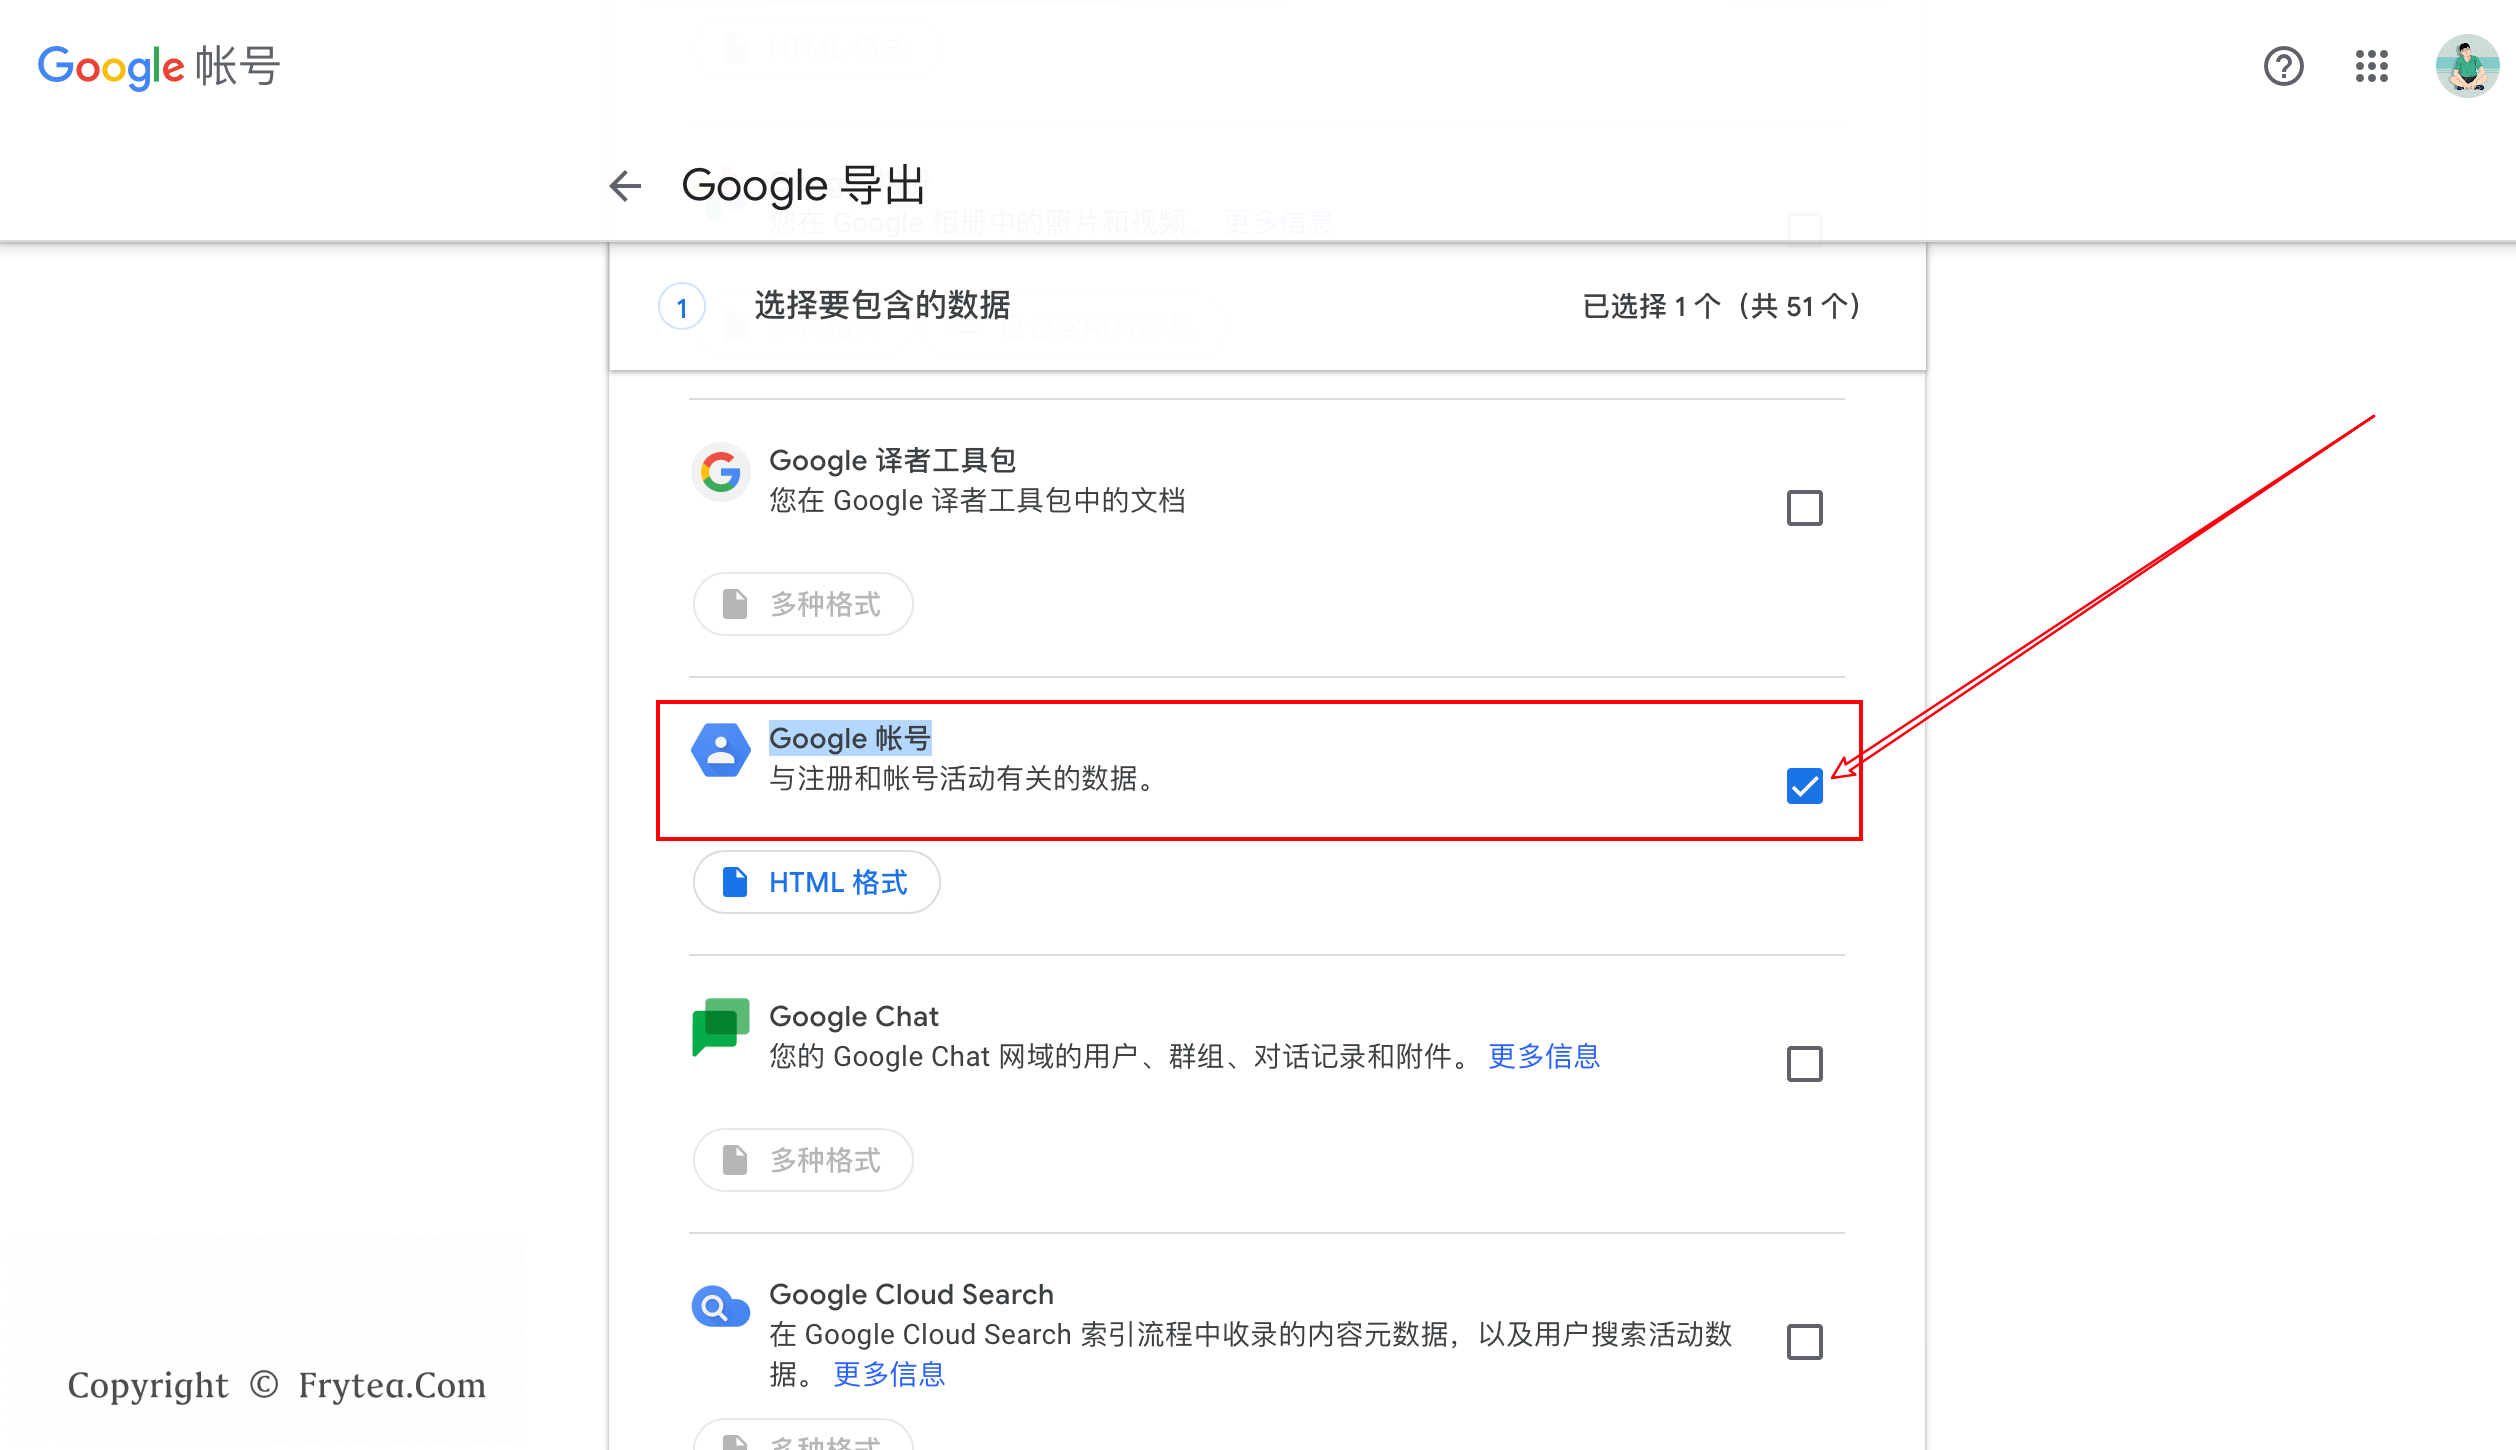
打开“您使用的应用和服务中的数据”-“下载或删除您的数据”-“下载您的数据”

选择 “Google 导出”选择“Google 帐号”

下载压缩包后,就可以查看html数据内容了

参考文献

Linux (Debian 系) 安装官方微信 (Electron,非 wine 版)

使用 Linux 作为唯一主力系统的阻力之一,就来自于微信。

微信大概是目前大多数人都无法离开的软件,而在 Linux 下安装微信在此前是比较复杂的,这对于使用 Linux 工作生活存在一些障碍。

最近才发现微信有推出基于 Electron.js 的一款桌面程序,不需要依赖 Wine 那复杂和冗余的依赖,只需要装一个稍微“大”一点的 deb 包就可以。

而且因为是基于 deb,理论来说 debian 系操作系统,如 Ubuntu、Kali 等都是可以直接安装的。

软件可以从优麒麟官网的软件下载页面找到:

https://www.ubuntukylin.com/applications/106-cn.html

在这个页面直接下载就可以,不要在其他陌生的地方下载。

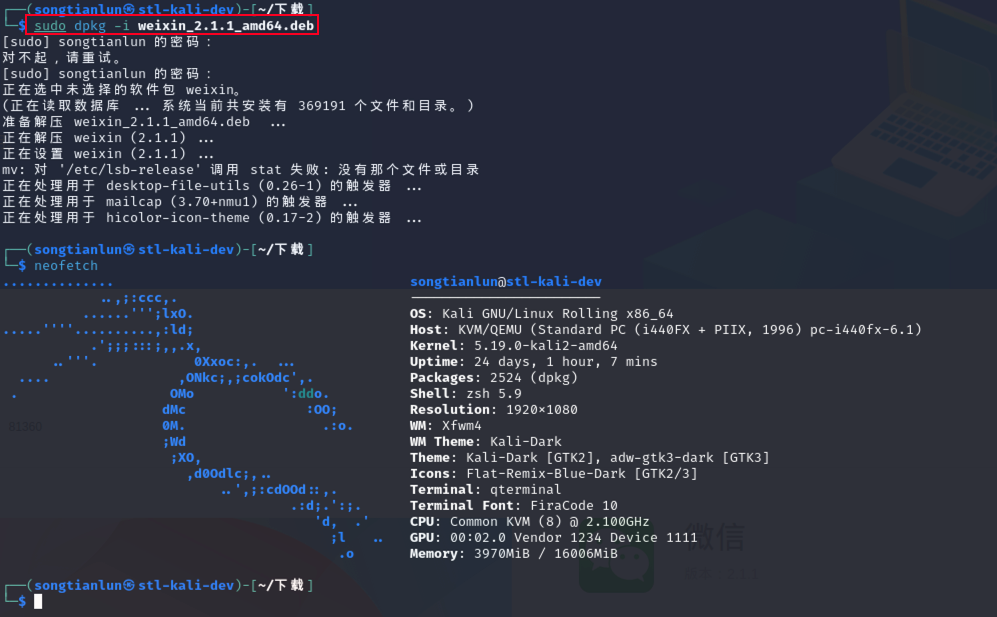
下载下来之后看一下,一个平平无奇的 deb 软件包, debian 系操作系统直接 dpkg -i xx.deb 安装即可,基本不会出现依赖问题。

实测在 kali 下正常使用。安装完成,就可以在软件清单找到微信了,直接打开即可,扫码登录即可使用。

不要抱有太高期待,现阶段只是能用。不过这对于大部分会考虑使用 linux 做主系统的人们来说,应该是够用了。

实际上在优麒麟官网还可以找到其他一些常用软件,可以看到 QQ 和微信还有提供一种 crosscover 版,也就是基于 wine 的,在 linux 运行 windows 的方式运行,这种方式也许功能会多一些,但依赖实在太多,配置复杂,用起来很繁琐,不推荐使用。

总结一下,当前国产操作系统发展越来越好,虽然与 windows、macos 的差距还很大,而且对于底层技术的掌控也比较有限,但这是一个很好的趋势,提升自己在 linux 下的工作能力,对于技术人员或是工作离不开计算机的人们来说,长期来看很有益处。

另外,在 linux 下几乎可实现所有想要的功能,相对 windows 或 macos 的直接使用,可以在这一过程中获得更多成就感。

参考文献

ChatGPT 注册方法(附万能接码方法)

ChatGPT 是一个训练有素的语言模型,由 OpenAI 公司训练而成。目的是帮助回答问题,提供信息和支持,但不具备人类的感知能力,也不会回答所有问题。

以上自我介绍原始内容来自 ChatGPT 回答。

目前已经有人用 ChatGPT 开始水帖、水回答,目前 Stack Overflow 已经暂时屏蔽来自 ChatGPT 的回答。

V2ex,即刻等社交媒体的 ChatGPT 浓度极高,这样一款充满争议性和未来感的 AI,目前处于公测阶段,可以尝试,本文介绍其注册方法。

注册步骤

注册步骤就是常规的帐号密码,难点主要在短信验证,其余部份暂时略过。

短信验证

使用 sms-man 接码,一次几美分,失败可退款重试。

充值有最低值限制,也不浪费,还能用于注册各种平台,如 Apple ID, PayPal 等。

注册充值后,购买一次 OpenAI 的短信接码,之后不断点击接收,若长时间无法接收,则删除重试:

成功后将验证码回填 OpenAI 即可。

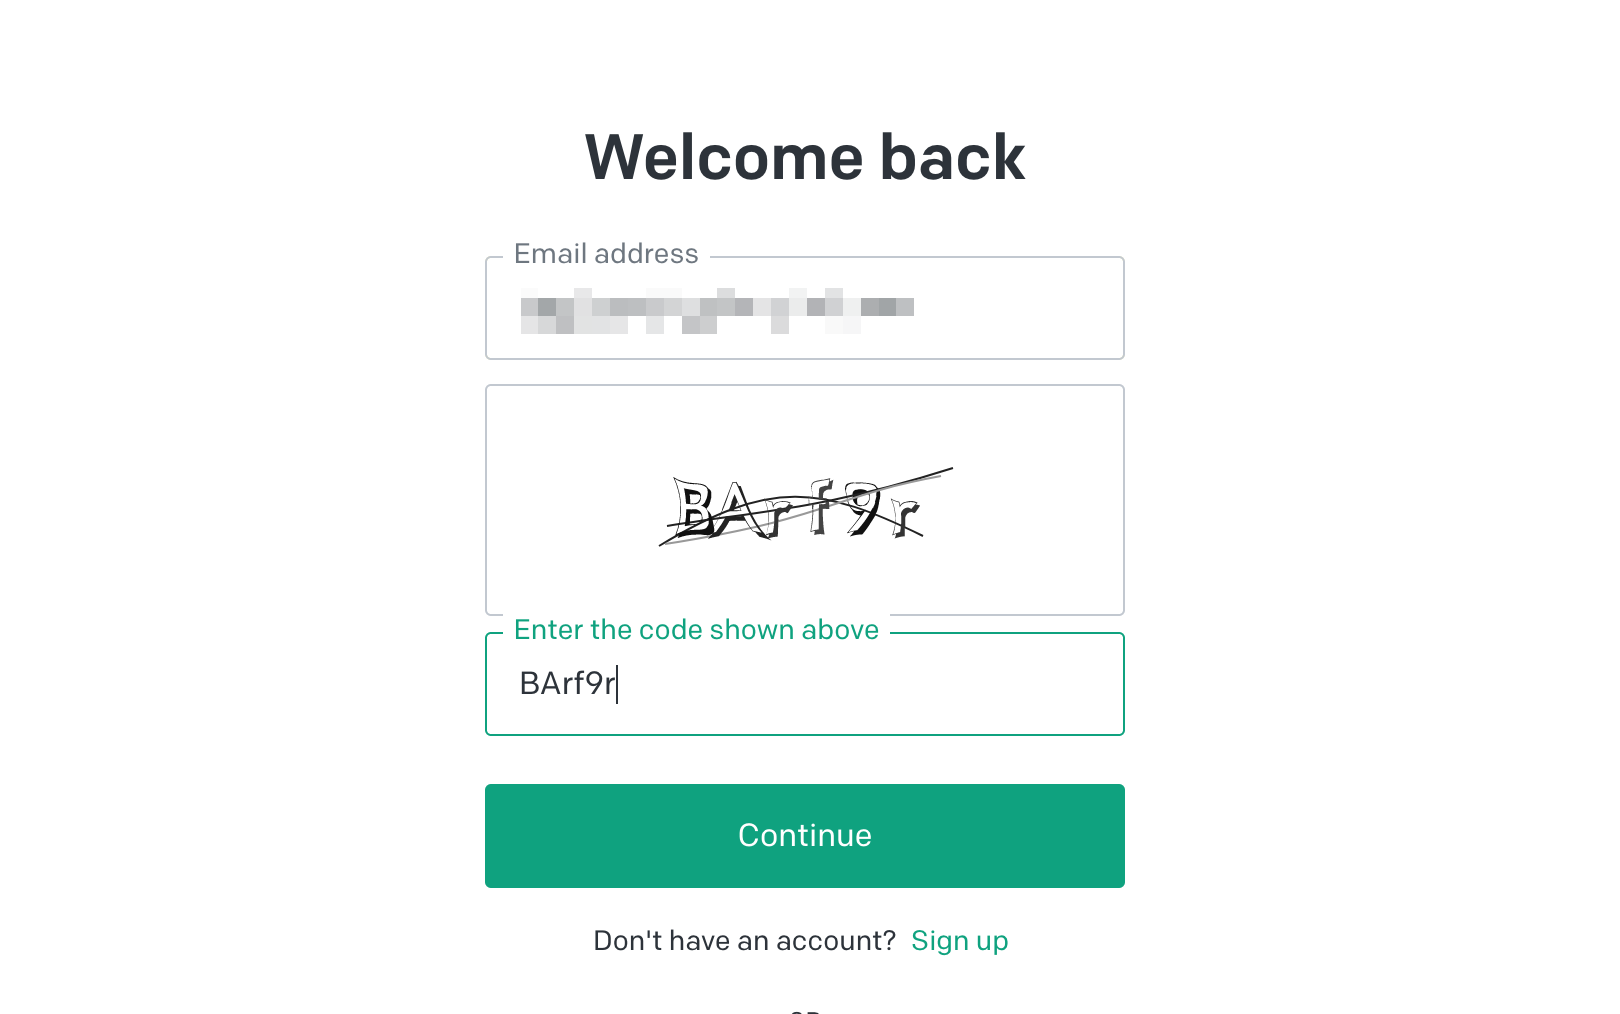
对了,这个 OpenAI 登陆时的验证码是区分大小写的:

演示

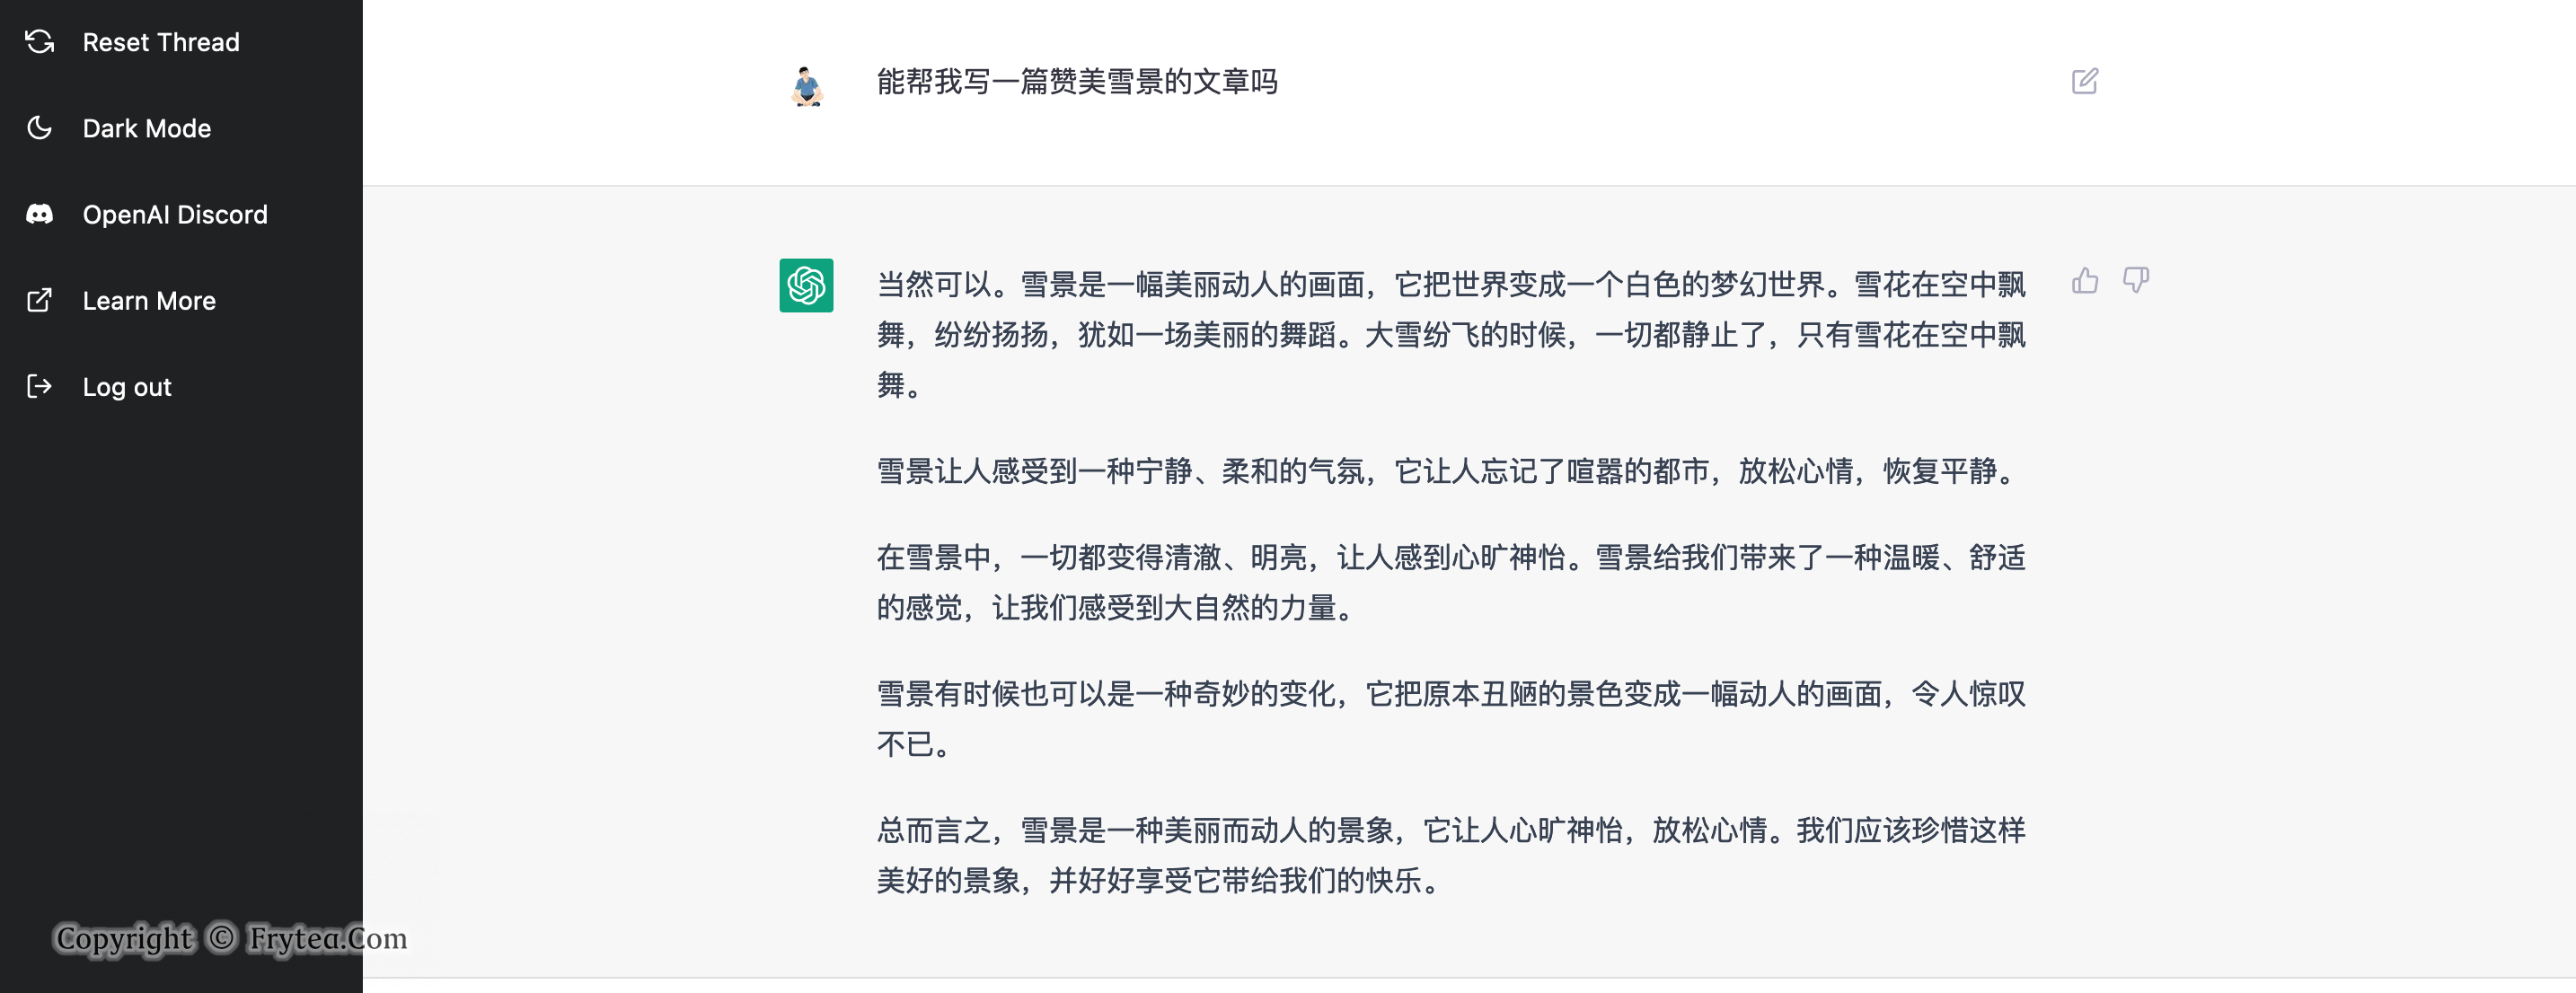
可以请他帮忙写文章:

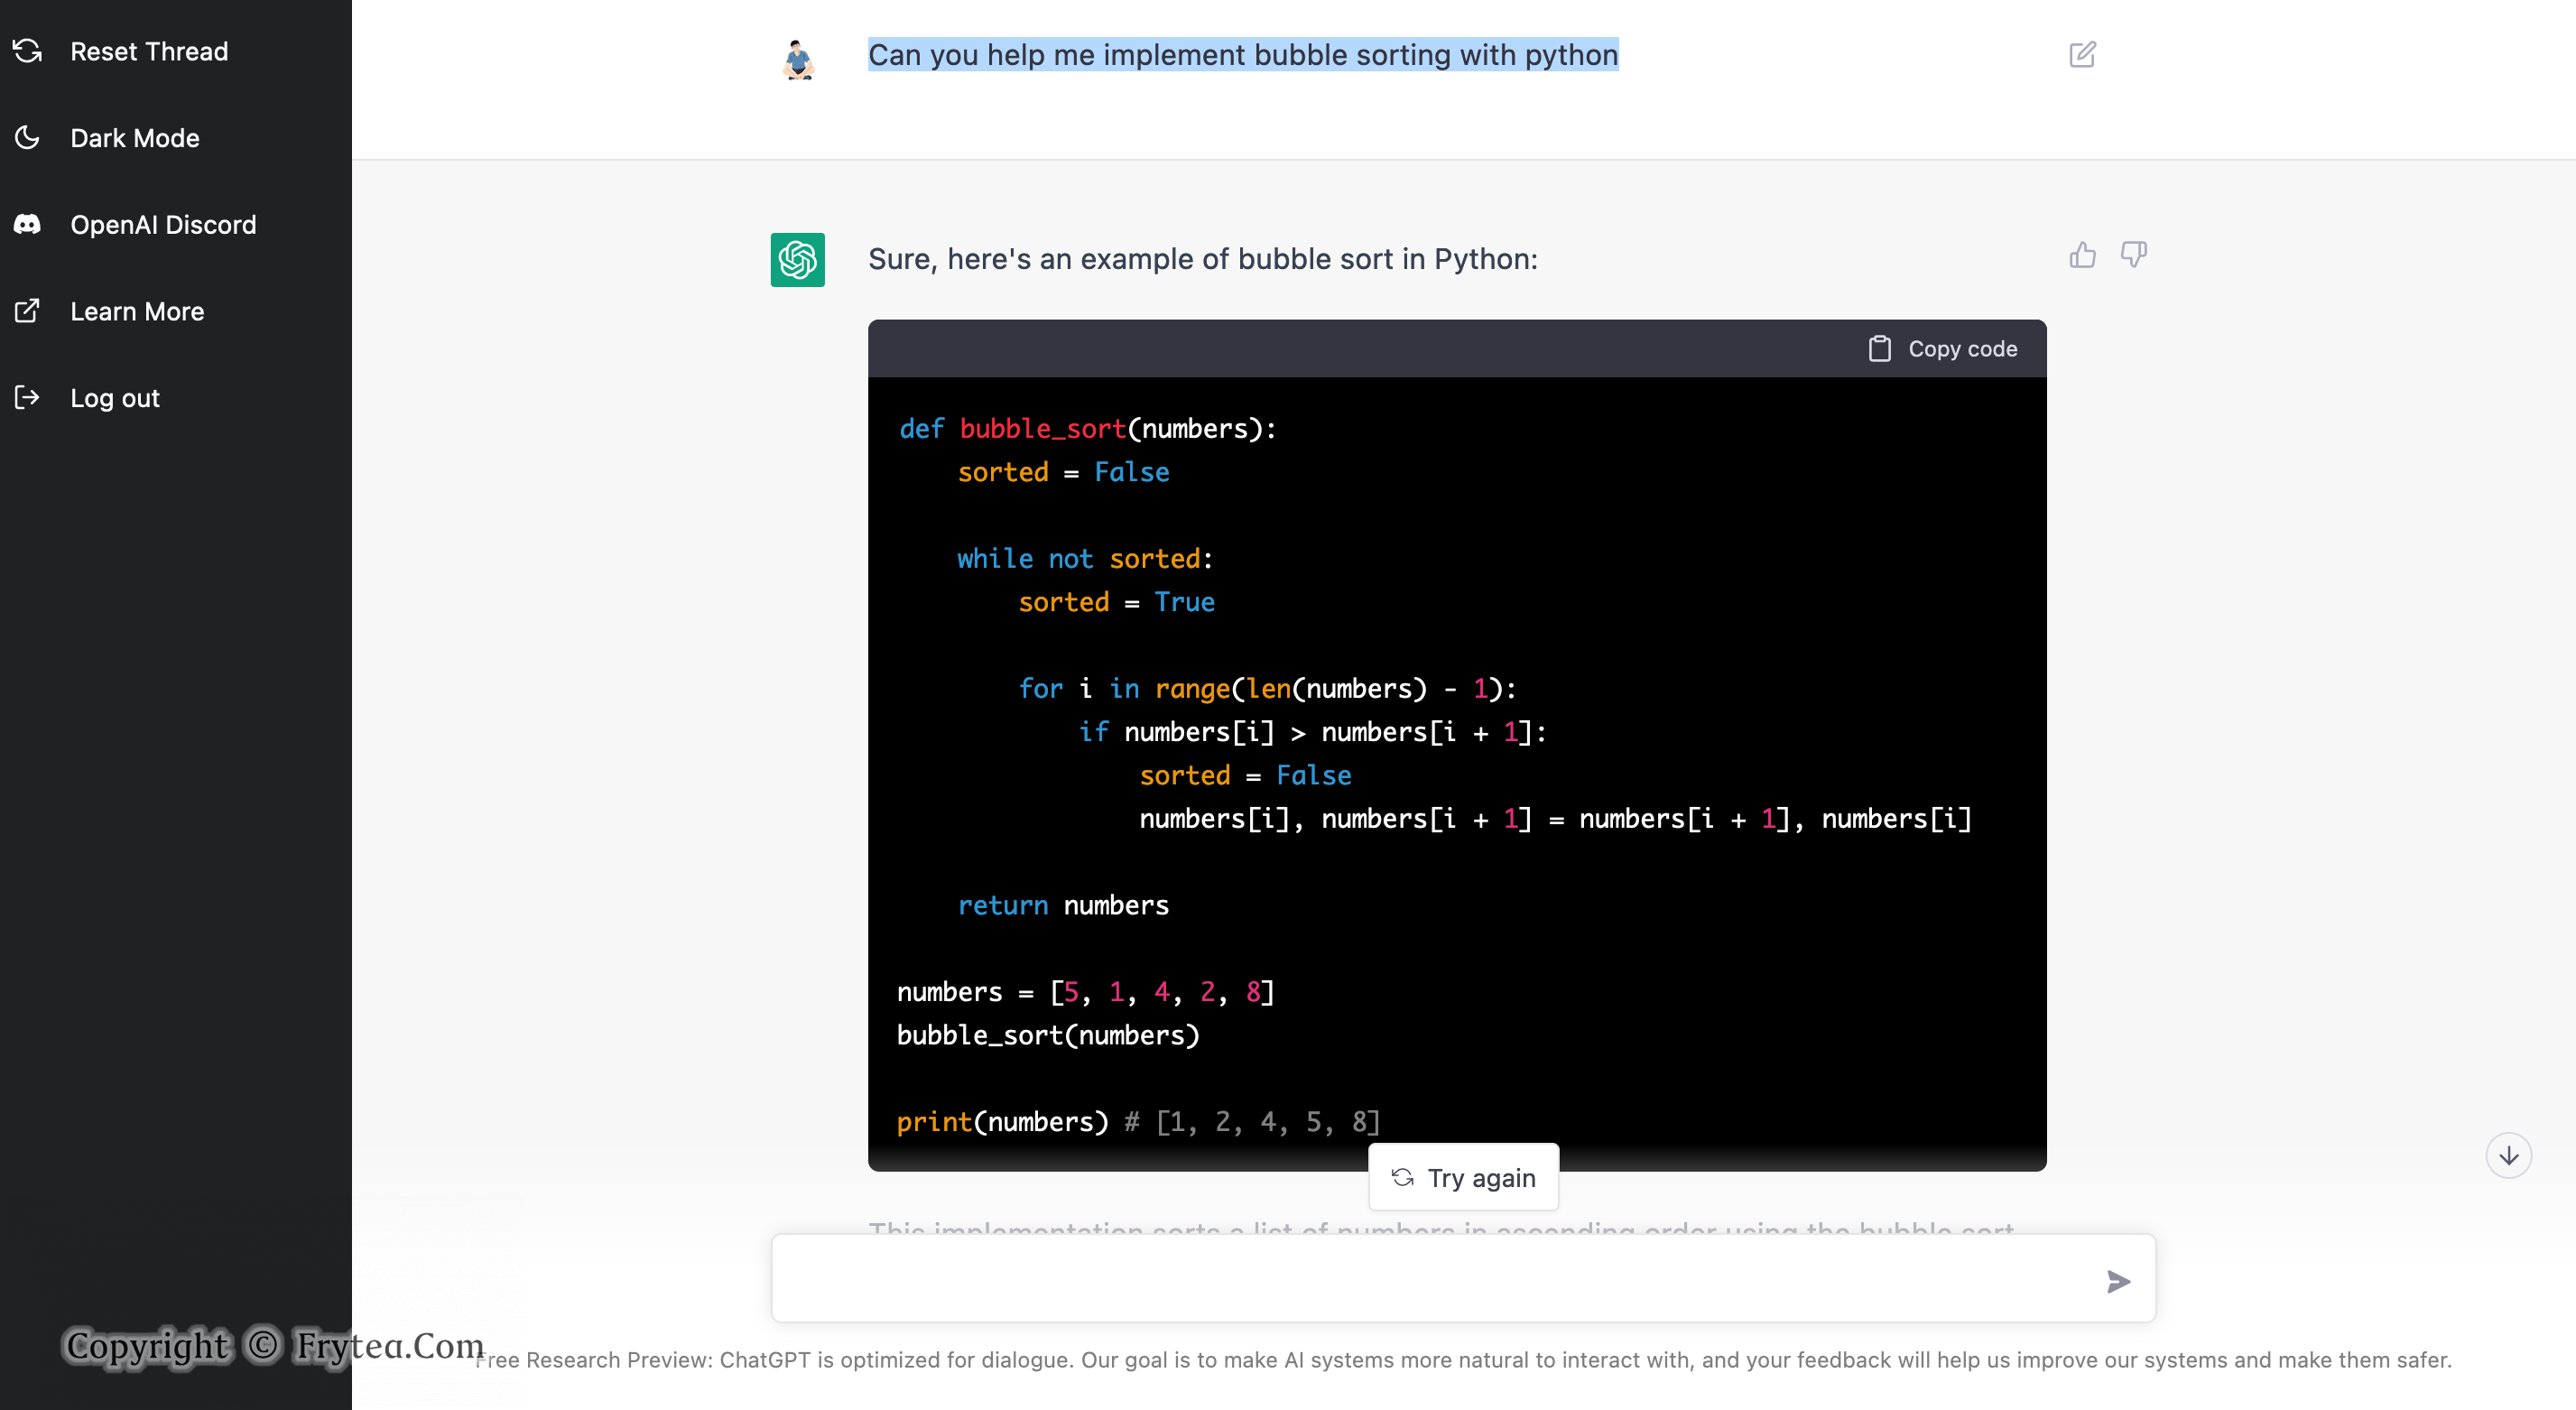
甚至实现常见算法:

有没有一种强烈的危机感。

这款软件的出现,将大神和菜鸟的差距进一步拉大。

一次简单的对话

tl.song: Can you help me implement insertion sort in python

ChatGPR: Yes, I’d be happy to help you implement insertion sort in Python! Here’s an implementation you can use as a starting point:

def insertion_sort(arr):

# Iterate over the array, starting at index 1

for i in range(1, len(arr)):

# Save the value at the current index

current_value = arr[i]

# Iterate backwards over the sorted portion of the array

j = i
while j > 0 and arr[j - 1] > current_value:
# Shift the larger value to the right
arr[j] = arr[j - 1]
j -= 1

# Insert the saved value into the correct position

arr[j] = current_value

return arr

To use this implementation, you can call the insertion_sort function and pass in the array you want to sort. For example:

arr = [5, 1, 4, 2, 8]
sorted_arr = insertion_sort(arr)

# sorted_arr will be [1, 2, 4, 5, 8]

Insertion sort is a simple sorting algorithm that works well for small arrays or partially-sorted arrays, but it is not very efficient for large arrays. It has a time complexity of O(n^2) in the worst case, so it is not suitable for sorting very large arrays.

不仅实现了代码,还附带分析时间复杂度,程序员这碗饭越来越难抢了。

参考文献

部署 Prometheus 主机监控完全体

监控完全体 = Prometheus + Node Exporter + cadvisor + grafana

Prometheus 作为轮转数据库,从各个服务器采集数据; node-exporter 作为数据采集器,接受 prometheus 采集请求,上报主机各项参数; vadvisor 作为容器数据采集器,接受 prometheus 采集请求,上报主机 docker 各项参数; grafana 作为看板,从 prometheus 查询数据做数据可视化。

部署 Promoetheus

准备配置文件 /data/docker/prometheus/prometheus.yml

global:
  scrape_interval:     15s # By default, scrape targets every 15 seconds.

  # Attach these labels to any time series or alerts when communicating with
  # external systems (federation, remote storage, Alertmanager).
  external_labels:
    monitor: 'codelab-monitor'

# A scrape configuration containing exactly one endpoint to scrape:
# Here it's Prometheus itself.
scrape_configs:
  # The job name is added as a label `job=
<job_name>` to any timeseries scraped from this config.
  - job_name: 'prometheus'

    # Override the global default and scrape targets from this job every 5 seconds.
    scrape_interval: 5s

    static_configs:
      - targets: ['localhost:9090']

  # 采集node exporter监控数据
  - job_name: 'vps2'
    static_configs:
      - targets: ['10.28.0.1:9100']

准备数据文件夹,并设置访问权限为 nobody

# 创建文件夹
mkdir -p /data/docker/prometheus/data

# 取得nobody的uid
docker run --rm quay.io/prometheus/busybox cat /etc/passwd
···
nobody:x:65534:65534:nobody:/home:/bin/false

# 配置文件夹权限
chown 65534:65534 -R /data/docker/prometheus/data

启动 prometheus

$ docker run -d \
    --name=prometheus \
    -p 9090:9090 \
    --network=myDefault \
    --restart always \
    --volume /data/docker/prometheus/prometheus.yml:/etc/prometheus/prometheus.yml \
    --volume /data/docker/prometheus/data:/prometheus \
    prom/prometheus:v2.40.4 \
    --web.enable-lifecycle \
    --config.file=/etc/prometheus/prometheus.yml \
    --storage.tsdb.path=/prometheus \
    --storage.tsdb.retention=365d

$ docker run -d \
    --name=prometheus \
    -p 9090:9090 \
    --network=myDefault \
    --restart always \
    --volume /data/docker/prometheus/prometheus.yml:/etc/prometheus/prometheus.yml \
    --volume /data/docker/prometheus/data:/prometheus \
    prom/prometheus:v2.40.4 \
    --web.enable-lifecycle \
    --config.file=/etc/prometheus/prometheus.yml \
    --storage.tsdb.path=/prometheus \
    --storage.tsdb.retention=365d
# --web.enable-lifecycle 允许热加载配置文件
# 注意放在镜像名后面的内容为映射到内部的配置标志

部署 Node Exporter 采集主机数据

可采用编译安装或包管理器直接安装。

编译安装

# x86
$ curl -OL https://github.com/prometheus/node_exporter/releases/download/v1.5.0/node_exporter-1.5.0.linux-amd64.tar.gz
$ tar -xzf node_exporter-1.5.0.linux-amd64.tar.gz
$ cp node_exporter-1.5.0.linux-amd64/node_exporter /usr/local/bin/
# arm64
$ curl -OL https://github.com/prometheus/node_exporter/releases/download/v1.5.0/node_exporter-1.5.0.linux-arm64.tar.gz
$ tar -xzf node_exporter-1.5.0.linux-arm64.tar.gz
$ cp node_exporter-1.5.0.linux-arm64/node_exporter /usr/local/bin/

$ sudo useradd -rs /bin/false nodeusr

$ echo "[Unit]
Description=Node Exporter
After=network.target

[Service]
User=nodeusr
Group=nodeusr
Type=simple
ExecStart=/usr/local/bin/node_exporter

[Install]
WantedBy=multi-user.target" > /etc/systemd/system/node_exporter.service

$ sudo systemctl daemon-reload
$ sudo systemctl enable node_exporter && systemctl start node_exporter

Ubuntu 等直接安装:

$ apt search node_exporter
Sorting... Done
Full Text Search... Done
prometheus-node-exporter-collectors/focal 0+git20200110.fc91c86-1 all
  Supplemental textfile collector scripts for Prometheus node_exporter

$ apt install -y prometheus-node-exporter-collectors

# 启动服务
$ systemctl enable prometheus-node-exporter.service && systemctl start prometheus-node-exporter.service
Synchronizing state of prometheus-node-exporter.service with SysV service script with /lib/systemd/systemd-sysv-install.
Executing: /lib/systemd/systemd-sysv-install enable prometheus-node-exporter

# OpenWRT
opkg update
opkg install prometheus-node-exporter-lua \
prometheus-node-exporter-lua-nat_traffic \
prometheus-node-exporter-lua-netstat \
prometheus-node-exporter-lua-openwrt \
prometheus-node-exporter-lua-wifi \
prometheus-node-exporter-lua-wifi_stations

curl localhost:9100/metrics

cat /etc/config/prometheus-node-exporter-lua
config prometheus-node-exporter-lua 'main'
        option listen_ipv6 '0'
        option listen_port '9100'
        option listen_interface 'lan'

/etc/init.d/prometheus-node-exporter-lua restart

重载 prometheus 配置文件

# 方法一  使用 SIGHUP 信号
kill -HUP $(pidof prometheus)
# 方法二 使用 POST 请求,需 --web.enable-lifecycle
curl -X POST http://localhost:9090/-/reload
# 实测两种方法在 Docker 下均不生效,猜测外部修改必须重启才能映射入容器,原因待查

部署 cadvisor

# 这里使用了我在 docker hub 镜像的官方 gcr 源镜像
# 避免无法拉取问题
# 普通 docker hub 镜像即可拉取
$ sudo docker run \
  --restart always \
  --volume=/:/rootfs:ro \
  --volume=/var/run:/var/run:ro \
  --volume=/sys:/sys:ro \
  --volume=/var/lib/docker/:/var/lib/docker:ro \
  --volume=/dev/disk/:/dev/disk:ro \
  --publish=8080:8080 \
  --detach=true \
  --name=cadvisor \
  --privileged \
  --device=/dev/kmsg \
  --net=myDefault \
  songtianlun/cadvisor:v0.46.0
$ curl http://localhost:8080

部署 grafana

docker run -d \
    --name=grafana \
    -p 3000:3000 \
    --network=myDefault \
    --restart always \
    grafana/grafana

默认帐号: admin/admin

看板模版在这里找: https://grafana.com/grafana/dashboards/

参考文献

mermaid.js 效果相册

mermaid 是一款 javascript 库,能够轻而易举地通过文本代码绘图。

作为普通用户,将其理解为一种绘图的语言即可,集成它之后就可以在 markdown 的轻松插入特定语法编写的各类图示了,而且不需要像 plantuml 一样需要外部服务器,目前 notionobsidian 等都已原生支持该特性,许多博客主题也支持该语法。

使用它,可以轻松在各类 md 编辑器中绘图,方便修改和传播。

具体语法请查看 mermaid 官网,本文展示一些在互联网发现的比较优秀的示例:

网络拓扑图

graph TD
 linkStyle default interpolate basis
 wan1[
<center>DSL 100/10 Mb<br><br>10.100.102.1</center>]---router{<center>EdgeRouter-X<br><br>10.20.30.1</center>}
 ip((
<center><br>IP<br><br></center>))-.-router
 dns((
<center><br>DNS<br><br></center>))-.-router
 wan2[
<center>LTE 50/20 Mb<br><br>192.168.1.1</center>]---router
 router---|100Mb|ap[
<center>RT-AC1200<br><br>10.20.30.3</center>]
 router---|1Gb|pc(
<center>PC<br><br>10.20.30.190</center>)
 router---|1Gb|switch[
<center>TL-SG105E<br><br>10.20.30.2</center>]
 subgraph red1
 ap-.-cam1(
<center>Camera<br><br>10.20.30.171</center>)
 ap-.-cam2(
<center>Camera<br><br>10.20.30.172</center>)
 ap-.-phone(
<center>Phone<br><br>10.20.30.191</center>)
 ap-.-ir(
<center>IR<br><br>10.20.30.180</center>)
 end
 subgraph red2
 switch---|100Mb|pi1(
<center>RPi 3B<br><br>10.20.30.150</center>)
 switch---|1Gb|pi2(
<center>RPi 3B+<br><br>10.20.30.151</center>)
 switch---|100Mb|nvr(
<center>NVR<br><br>10.20.30.170</center>)
 switch---|1Gb|laptop(
<center>Laptop<br><br>10.20.30.192</center>)
 end

参考文献

Juice FS 初探 | 一种为 VPS 提供无限磁盘空间的解决方案

JuiceFS 是一款面向云原生设计的高性能分布式文件系统,在 Apache 2.0 开源协议下发布。提供完备的 POSIX 兼容性,可将几乎所有对象存储接入本地作为海量本地磁盘使用,亦可同时在跨平台、跨地区的不同主机上挂载读写。

使用 JunicsFS 将云厂商的 S3 对象存储挂载到本地,就得到一个几乎无限容量的 VPS 空间了。目前 Juice 支持大部份主流厂商提供的 s3 服务,具体请查阅官方文档。

本文以 腾讯云 COS + 腾讯云轻量服务器,演示一下基本使用。

挂载 COS 到本地

使用以下命令即可创建一个基于 COS 的文件系统,下面演示基于 sqlite 和 redis 的创建、挂载、卸载命令。

# Jfs With Redis
juicefs format \
    --storage cos \
    --bucket jfs-redis-******** \
    --access-key ******** \
    --secret-key ******** \
    "redis://127.0.0.1:6379/1" \
    jfs-redis
# 挂载
juicefs mount -d "redis://127.0.0.1:6379/1" /mnt/jfs-redis/
# 卸载
juicefs umount /mnt/jfs-redis/

# Jfs With sqlite
juicefs format \
    --storage cos \
    --bucket jfs-******** \
    --access-key ******** \
    --secret-key ******** \
    "sqlite3:///opt/jfs/jfs.db" \
    jfs
# 挂载
juicefs mount -d "sqlite3:///opt/jfs/jfs.db" /mnt/jfs/
# 卸载
juicefs umount /mnt/jfs/

自动挂载

具体使用时,可以配置一下自动挂载,方法如下。

首先创建一个从 /sbin/mount.juicefsjuicefs 可执行文件的软链接,操作系统解析 fstab 时会调用 /sbin/mount.juicefs 命令。

$ which juicefs
/usr/local/bin/juicefs
$ ln -s /usr/local/bin/juicefs /sbin/mount.juicefs

新增以下内容到 /etc/fstab 使得开机自动挂载,这里以上文 sqlite 为例:

sqlite3:///opt/jfs/jfs.db    /mnt/jfs       juicefs     _netdev,max-uploads=50,writeback,cache-size=204800     0  0

使用 mount -a 使配置生效

限制容量和文件数

没有限制的行为可想而知,JuicsFS 的默认限制较高,可以手动限制一下文件系统的容量和文件数量。

# 限制文件系统容量 (GiB)
$ juicefs config "sqlite3:///opt/jfs/jfs.db" --capacity 102400
# 限制文件数量 (inode 数)
$ juicefs config "sqlite3:///opt/jfs/jfs.db" --inodes 100000

限制容量举例,可以看到设定前后可以看到挂载点容量的变化:

# 示例
$ df -h | grep jfs
Filesystem      Size  Used Avail Use% Mounted on
JuiceFS:jfs     1.0P  8.0K  1.0P   1% /mnt/jfs

# 设定容量上限为 128 GiB
$ juicefs config "sqlite3:///opt/jfs/jfs.db" --capacity 128
2022/11/20 21:07:08.832094 juicefs[2253158] 
<INFO>: Meta address: sqlite3:///opt/jfs/jfs.db [interface.go:402]
  capacity: 0 GiB -> 128 GiB

# 再次查看发现大小为 128GiB
$ df -h | grep jfs
JuiceFS:jfs     128G  8.0K  128G   1% /mnt/jfs

限制文件 inodes 数量举例,可以看到设定前后可以看到挂载点容量的变化:

# 示例
$ df -i
Filesystem       Inodes  IUsed    IFree IUse% Mounted on
/dev/vda2       3901440 367127  3534313   10% /
JuiceFS:jfs    10485762      2 10485760    1% /mnt/jfs

$ juicefs config "sqlite3:///opt/jfs/jfs.db" --inodes 3901440
2022/11/20 21:13:30.977616 juicefs[2255902] 
<INFO>: Meta address: sqlite3:///opt/jfs/jfs.db [interface.go:402]
    inodes: 0 -> 3901440
$ df -i
Filesystem       Inodes  IUsed    IFree IUse% Mounted on
/dev/vda2       3901440 367128  3534312   10% /
JuiceFS:jfs     3901440      2  3901438    1% /mnt/jfs

性能测试

文件系统怎么能没有性能测试呢,下面分别使用 dd 和自带 bench 演示性能。

dd 简单读写测试

# 本地文件系统 io 性能
$ sync; dd if=/dev/zero of=/tmp/tempfile-12138 bs=1M count=1024; sync
1024+0 records in
1024+0 records out
1073741824 bytes (1.1 GB, 1.0 GiB) copied, 5.563 s, 193 MB/s

# JuicfFS sqlite 元数据驱动性能
$ sync; dd if=/dev/zero of=/mnt/jfs/tmpfile bs=1M count=1024; sync
1024+0 records in
1024+0 records out
1073741824 bytes (1.1 GB, 1.0 GiB) copied, 6.97672 s, 154 MB/s

# JuicfFS redis 元数据驱动性能
$ sync; dd if=/dev/zero of=/mnt/jfs-redis/tmpfile-12138 bs=1M count=1024; sync
1024+0 records in
1024+0 records out
1073741824 bytes (1.1 GB, 1.0 GiB) copied, 5.59675 s, 192 MB/s

juicefs bench 测试

本地文件系统成绩

# juicefs bench -p 4 /tmp/
  Write big blocks count: 4096 / 4096 [==============================================================]  done
   Read big blocks count: 4096 / 4096 [==============================================================]  done
Write small blocks count: 400 / 400 [==============================================================]  done
 Read small blocks count: 400 / 400 [==============================================================]  done
  Stat small files count: 400 / 400 [==============================================================]  done
Benchmark finished!
BlockSize: 1 MiB, BigFileSize: 1024 MiB, SmallFileSize: 128 KiB, SmallFileCount: 100, NumThreads: 4
+------------------+------------------+--------------+
|       ITEM       |       VALUE      |     COST     |
+------------------+------------------+--------------+
|   Write big file |     153.98 MiB/s | 26.60 s/file |
|    Read big file |     148.60 MiB/s | 27.56 s/file |
| Write small file |   2064.9 files/s | 1.94 ms/file |
|  Read small file |   3150.8 files/s | 1.27 ms/file |
|        Stat file | 111847.4 files/s | 0.04 ms/file |
+------------------+------------------+--------------+

juicefs + sqlite 成绩

$ juicefs bench -p 4 /mnt/jfs
  Write big blocks count: 4096 / 4096 [==============================================================]  done
   Read big blocks count: 4096 / 4096 [==============================================================]  done
Write small blocks count: 400 / 400 [==============================================================]  done
 Read small blocks count: 400 / 400 [==============================================================]  done
  Stat small files count: 400 / 400 [==============================================================]  done
Benchmark finished!
BlockSize: 1 MiB, BigFileSize: 1024 MiB, SmallFileSize: 128 KiB, SmallFileCount: 100, NumThreads: 4
Time used: 72.0 s, CPU: 35.5%, Memory: 704.1 MiB
+------------------+------------------+---------------+
|       ITEM       |       VALUE      |      COST     |
+------------------+------------------+---------------+
|   Write big file |     148.25 MiB/s |  27.63 s/file |
|    Read big file |     144.29 MiB/s |  28.39 s/file |
| Write small file |     40.5 files/s | 98.83 ms/file |
|  Read small file |    715.9 files/s |  5.59 ms/file |
|        Stat file |   3759.0 files/s |  1.06 ms/file |
|   FUSE operation | 71735 operations |    2.99 ms/op |
|      Update meta |  4773 operations |   27.18 ms/op |
|       Put object |  1424 operations |  443.33 ms/op |
|       Get object |     0 operations |    0.00 ms/op |
|    Delete object |     0 operations |    0.00 ms/op |
| Write into cache |  1424 operations |  281.82 ms/op |
|  Read from cache |  1428 operations |  556.68 ms/op |
+------------------+------------------+---------------+

juicefs + redis 成绩

试着跑了一次,结果跑崩了,想玩的自己跑一跑吧。

由于 redis 是内存数据库,跑这种没有上限的测试一定要谨慎。在实际使用中,也要根据自己的需要选择,否则机器很容易 gg。

垃圾清理

juicefs 默认有回收站机制,删除文件默认在回收站保留一天。

可以去挂载目录下执行这条命令彻底删除:

$ find .trash -name '*.tmp' | xargs rm -f

总结

本文介绍了 JuiceFS 的基本用法,为“大盘鸡”需求提供一种新的思路,展示了使用对象存储挂载到机器作为文件系统的基本效果。

目前看来是解决系统盘过小问题的好方案,但具体是不是采纳这种方案,等我明天看看账单再做决定。

第二天看了下账单,跑了大概 10 轮测试,账单 0.02¥ ,初步看还能接受:

至于元数据引擎的选择,在单节点服务器的需求上我还是偏向 sqlite 或 mysql 集群的方案,redis 虽然性能强劲,但实在有点吃不消。

最后,这一定是一个很棒的项目,在对接 docker、k8s 之类的容器设施非常方便,提供了插件,可以像操作默认存储卷一样使用,还可以直接使用挂载在本地的路径,总之,在一些方面 JuiceFS 做的已经很好了,下面就是等待时间的检验了。

参考文献

2022 年注册美区 Apple ID 方法概述(使用美区 Paypal)

有些工作需要用到的软件只有美区 Apple Store 才有,还有一些想玩的游戏也是在国区无法下载,因此注册一个自己的美区 Appid ID 就能方便很多,这里记录一下注册方法。

本方案越需要花费 9/35 RMB,且需要 VISA(国区即可)信用卡,介意者绕道。

注册美区 Appid ID 主要的难点在于付款地址和付款方式的认定。本文主要也是解决这两个问题。

付款方式

苹果帐号要求绑定的付款方式必须是本区域的,也就是说我们在国区申请的信用卡,即使是 VISA 也是无法绑定使用的。

在这里通过 Paypal 的方式绕过,美区 Paypal 可以绑定国区 VISA,最近亲测可用,而且还能够正常付款。

现在问题就转移为美区 Paypal 的注册,美区 Paypal 注册难点在于手机号认证,必须使用美区手机号,而且不能使用网络号码(如 Google Voice)。

在这里使用 SMS-Man 解决,该平台至少充值 35¥,接码美区 paypal 服务需要 1.14$ ,差不过 9¥,剩下的钱也可以用来帮助他人,或是其他用途。不知道能不能退。

使用方法就不多说了,正常操作即可,注册 paypal 选择美国,电话选择 sms-man 生成的,之后点击接码。一次不行,就多试几次,五分钟还接不到,就删掉换一个再试。

此方法亲测可用。

付款地址

注册好苹果帐号,之后国家和地区选择美国,账单地址建议填写免税区,否则买东西都是有税的。

这里贴一张知乎大神整理的:

我这里选择了俄勒冈州,具体地址可以使用下面这个工具生成一个:

打开就可以获取到一个可用的地址,根据需要填写即可。

注册 ID 地区为美国,账单地址为上文生成的,付款方式使用上文注册的 Paypal ,这样一来就大功告成,可以在美区 Apple Store 使用国区 VISA 愉快的购物了。

最后,本方法仅用于学习研究之用,切勿用于非法用途。本站不承担任何连带责任。

希望本文介绍的方法对你有用。

参考文献